
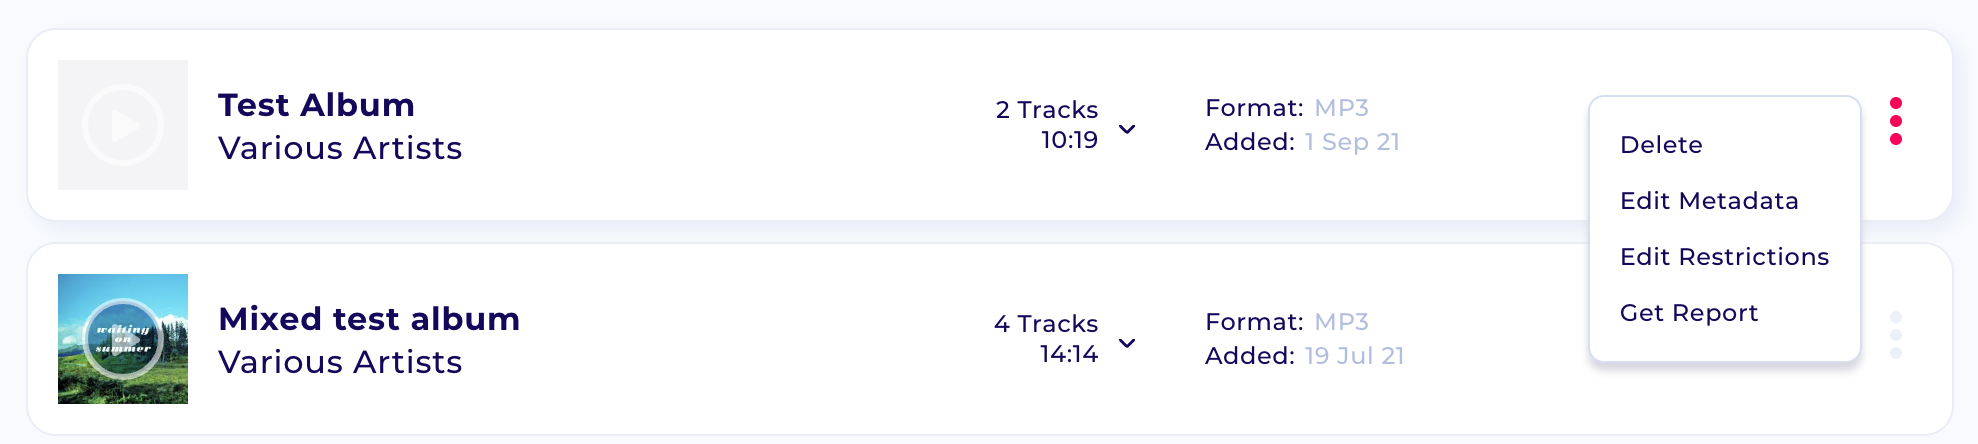
Team plan – Editing Team Restrictions
Byta’s Team plan allows users to access a shared team audio folder, and as such you will require sharing restrictions to control how and when your audio is shared. Learn more below as to how you can set the restriction options available. If you are looking to share audio with the team before it is ready for release, or you only want their recipients to be able to stream then editing Team restrictions will offer you this control.
Learn about adding team members to your plan here.
Moving Audio to your Team folder
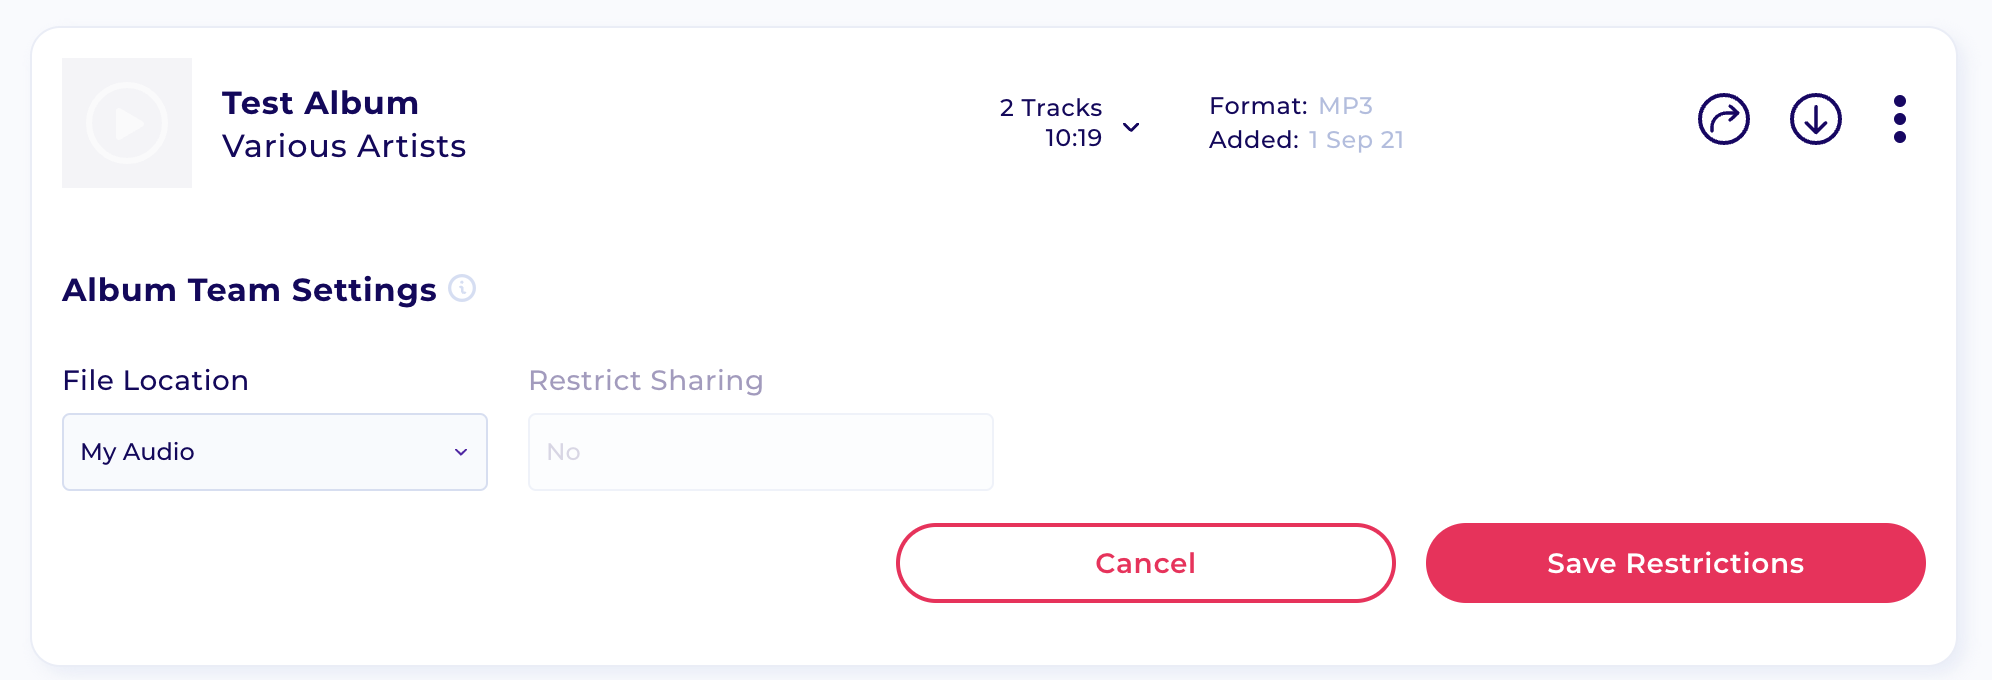
Moving your already uploaded audio between shared and personal audio libraries is simple. Click the “edit restrictions” link in the extended menu, then update the file location to be “Team Audio”. If you don’t wish for them to share immediately, set “restrict sharing” to yes before saving restrictions. Once you are ready to move click “Save Restrictions”. Your team will now be able to see the file in their shared audio library. The next step is to ensure that the restrictions are set so you can control if and how they share the audio.
How to Edit Sharing Restrictions
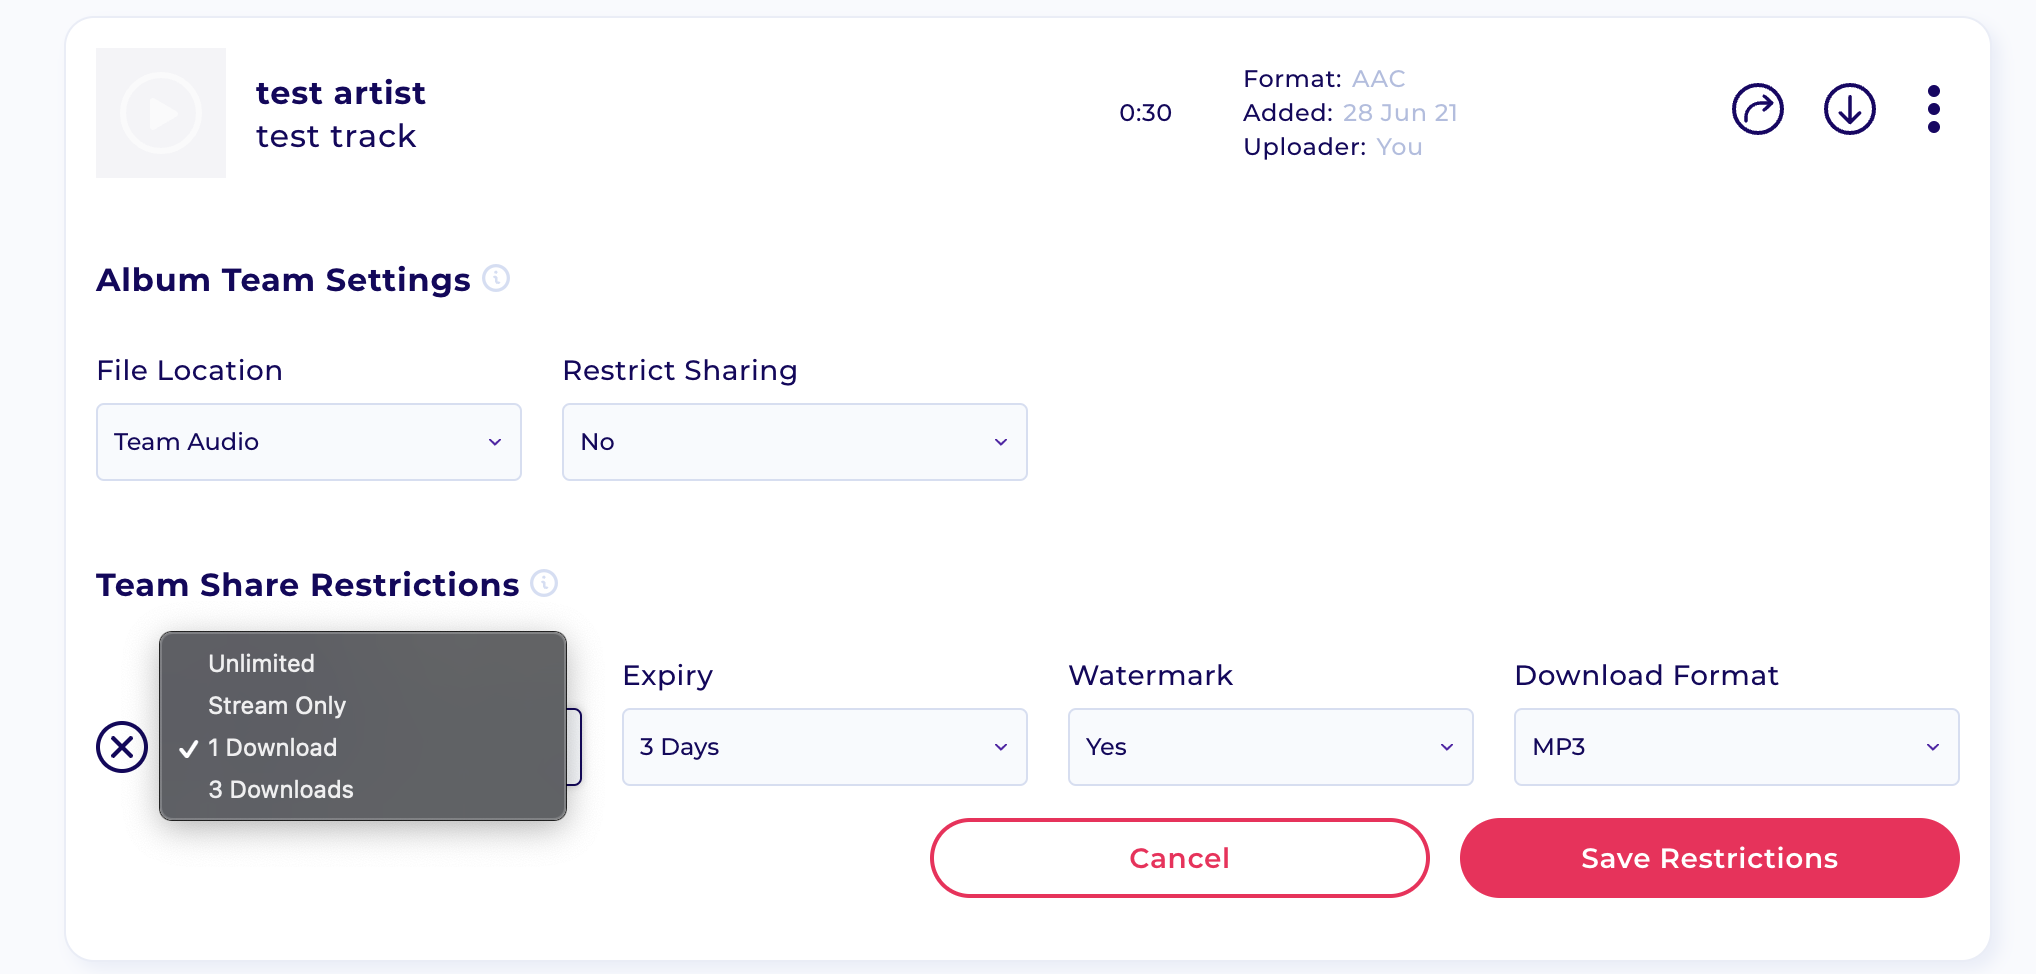
Once your audio is in the Team audio folder you can edit your restrictions by clicking “edit restrictions” from the extended menu. First, set “restrict sharing” to “no” before you start adding Share Restrictions. Click the “+” icon next to the Team Share Restrictions (leaving this unset allows team members to share with no restrictions). Finally, set the sharing restrictions that will be applied when team members share. Note: Watermarking will only be available if you are on a Team account with Watermarking applied.
Removing Team Sharing Restrictions
Removing or editing team restrictions is as simple as going back to “edit restrictions” and changing sets. If you wish to remove restrictions click the “x” next to the restriction options and save.